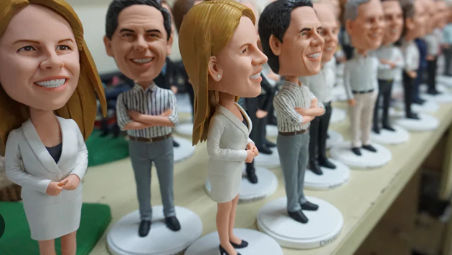
Custom bobbleheads have become a popular gift choice, offering a unique and personalized way to celebrate someone special. Whether for a birthday, wedding, or corporate event, these quirky figurines capture the essence of the individual they’re modeled after. But have you ever wondered how these delightful bobble heads are made? Let’s take a look at the step-by-step process behind creating a custom bobble head.
Step 1: Gathering Reference Materials
The first step in creating a custom bobble head is gathering the necessary reference materials. Customers are typically asked to provide clear and high-quality photos of the person they want to turn into a bobble head. These photos should include front, side, and close-up views to ensure the artist can accurately capture the individual’s facial features and hairstyle.
It’s also helpful to provide additional details about the person’s personality or any special elements that should be incorporated, such as a favorite outfit, hobby, or profession. This information helps the artist create a design that truly reflects the person’s character.
Step 2: Sculpting the Head
Once the reference materials are received, the sculpting process begins. This is where the real magic happens. Skilled artists use the photos and details provided to craft the head of the bobble head out of clay or a similar material. Special attention is given to replicating the unique facial features, expression, and hairstyle of the person.
The head is often sculpted larger than the body, giving the bobble head its signature playful look. Once the sculpting is complete, the customer is typically sent a preview of the model to review and request any changes before moving on to the next stage.
Step 3: Designing the Body and Outfit
After the head is sculpted, it’s time to design the body of the custom bobble head. This stage allows for creativity and personalization, as the body can be tailored to represent the individual’s profession, hobbies, or special interests. Whether they’re dressed in a business suit, sports uniform, or casual outfit, the details are carefully crafted to reflect their style and personality.
Some customers also request specific props or accessories, such as musical instruments, pets, or sports gear, to make the bobble head even more customized and meaningful.
Step 4: Molding and Casting
Once the design is finalized, the bobble head enters the molding and casting phase. A mold is created based on the original clay sculpture, and resin or polymer materials are used to cast the final figure. This process ensures durability while preserving the intricate details crafted during the sculpting stage.
The bobble head is then assembled, with the head attached to the body using a spring, giving it that classic bobble effect. The figure is now ready for painting and final touches.
Step 5: Painting and Finishing Touches
In the final step, skilled artisans hand-paint the custom bobble head, carefully matching skin tones, eye color, hair color, and other important details based on the photos provided. The outfit, accessories, and other elements are painted with precision to ensure a realistic and accurate representation of the individual.
Once the painting is complete, the bobble-head undergoes a final quality check to ensure that everything is perfect. The finished product is then packaged and shipped to the customer, ready to be gifted or displayed.
Conclusion: A Unique Keepsake
The process behind making a custom bobble head is intricate and detailed, requiring artistic skill and careful attention to the customer’s specifications. From the initial sculpting to the final hand-painted touches, each step is designed to create a unique and personalized figurine that captures the essence of the individual. Whether it’s for a special occasion or just for fun, a bobble head is a one-of-a-kind keepsake that will be cherished for years to come.

